Battle of Marr-Adetta
From Gineipaedia, the Legend of Galactic Heroes wiki
| Battle of Marr-Adetta | |||||
| (Second Alliance-Imperial War) | |||||
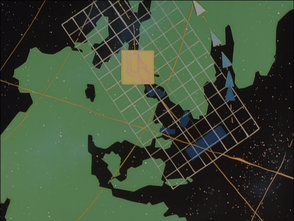
 The Fahrenheit Fleet moving to encircle the Alliance fleet | |||||
| Date: | 16 January 800 UC (2 NIC / 491 IC / 3600 CE) | ||||
| Location: | Marr-Adetta Starzone | ||||
| Result: | Major Imperial victory | ||||
| |||||
| |||||
| |||||
| |||||
The Battle of Marr-Adetta Starzone (Japanese: マル・アデッタ星域会戦) was the first and only major battle of the Second Alliance–Imperial War.
History
In 800 UC (2 NIC / 491 IC / 3600 CE), Fleet Admiral Alexandre Bewcock commanded the last remaining fleet in the Free Planets Alliance, numbering 20,000 ships, in a desperate attempt to turn back the New Galactic Empire. Knowing that his vastly outnumbered fleet was also deficient in battleships and carriers due to the enforced demolition stipulated by the Treaty of Ba‘alat, Bewcock chose to make a stand in the easily defensible Marr-Adetta Starzone. The Marr-Adetta Starzone had no planetoids exceeding 120km in diameter and was composed of 3 large dense belts of asteroids. The star itself was unstable with intense bursts of radiation and strong solar winds impairing communications. The main Alliance force deployed at the mouth of a narrow clear and navigable tunnel in one of the asteroid belts which measured 920,000km in length and 40,000km in width.
The opening salvos of the battle were fired at 10:30 on 16 January 800 UC (2 NIC / 491 IC / 3600 CE). Within 20 minutes, Bewcock's fleet had commenced an orderly fighting withdrawal into the tunnel, pursued by the fleets of Alfred Grillparzer and Bruno von Knappstein, with Grillparzer's fleet taking the vanguard. Knowing the star was unstable, Bewcock ordered the Alliance fleet to tether themselves securely with clamps to the shadowed dark side of large asteroids. At 11:20, there was an increased burst of solar flare activity and intensified solar wind which sent a flurry of small asteroids into the Imperial fleets, causing confusion and some ship losses from collisions. Grillparzer ordered his ships to stay clear of the asteroids at the edges of the tunnel, but this led to his fleet massing together and presenting a densely packed target to Bewcock's fleet, which had remained unscathed from the asteroids due to their tethers. Taking increased losses from Bewcock's concentrated firepower, Grillparzer withdrew from the tunnel, though his fleet sustained further losses from a second burst of solar activity that sent more asteroids careening through his fleet. Grillparzer's flagship, Eistla, suffered damage in the withdrawal and his fleet had sustained 30% losses. Bewcock declined to pursue Grillparzer out of the tunnel, all too aware that Grillparzer and the main body of the much larger Imperial fleet had deployed in a counterattack envelopment formation at the exit from the tunnel.
At 12:10, the damaged Grillparzer Fleet was ordered to withdraw, to be replaced by the Knappstein Fleet which was ordered to enter the tunnel and engage the Alliance forces. This was meant to divert the Alliance's attention from the Fahrenheit Fleet which was passing around the Alliance's left flank into the Alliance rear by going through another more distant navigable section of the asteroid belt. The Knappstein Fleet was met with fierce Alliance fire upon entry into the tunnel and dispersed into smaller groups hugging the edges of the tunnel in order to present a more diffuse target. However some of the ships of these smaller formations became isolated in the small spaces between asteroids and were picked off by concentrated Alliance fire. Knappstein's advance quickly stalled.
When the Fahrenheit Fleet began advancing into the tunnel, Bewcock's fleet quickly turned around and advanced to engage Fahrenheit head on. Seeing that the Alliance had been prepared for an attack, Fahrenheit backed his fleet out of the tunnel, planning to engage Bewcock as the Alliance fleet emerged. Meanwhile, Knappstein attempted to advance further when he saw Bewcock turn away from him, but was faced by multiple dense layers of mines deployed by Bewcock, forcing Knappstein to stop to clear them with his point defence weapons. At this point, a smaller Alliance detachment under the command of Ralph Carlsen emerged from where it had been hiding among the asteroids and hit the left flank of the Fahrenheit Fleet.
(LOGH: 'The Battle of Marr-Adetta Starzone (Part One)', 'The Battle of Marr-Adetta Starzone (Part Two)')